**Update 5/5/19** This pattern has been re-written and updated. For a much better version, please visit my new website Oh Darn Yarn! See you there!
Happy Monday, everybody!
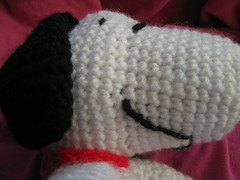
This is the final part of the snoopy crochet pattern. I hope you have found the patterns to be easy to follow so far.
Let's get started:
Arms (Make 2)
With white yarn,
Sc 6 in a magic ring.
R1: 2 sc in each sc.
R2: *Sc 5, 2 sc in next sc*, twice.
R3: *Sc 6, 2 sc in next sc*, twice.
R4 - R5: 1 sc in each sc around.
R6: *Sc 6, sc2tog*, twice.
R7 - R8: 1 sc in each sc around.
R9: *Sc 5, sc2tog*, twice.
R10: Sc 1 in each sc around.
R11: *Sc 4, sc2tog*, twice.
R12: Sc 1 in each sc around.
Finish off, leaving a long tail to sew.
Stuff and sew onto body. Make sure you sew the arm close as you sew them onto the body! I attached the head to the body first, and then I sewed the arms 1 row under where his "neck" is. This is so that I would have room for his collar!
Legs (Make 2)
With white yarn,
8 sc in a magic ring.
R1: 2 sc in each sc.
R2: *Sc 7, 3 sc in next sc*, twice
R3: 1 sc in each sc.
R4: *Sc 9, 3 sc in next sc*, twice
R5: In back loops only: sc 1 in each sc around.
R6 - R7: 1 sc in each sc around.
R8: In back loops only: sc 6, dc 6, sc 6, hdc 6.
R9: *Sc 2, sc2tog*, repeat around.
R10: In front loops only: *Sc 1, sc2tog*, repeat around.
R11 - R13: Sc 1 in each sc around.
Finish off, leaving a tail to sew onto body.
Stuff, sew onto body. I sewed his legs more towards the front of his body than the sides.
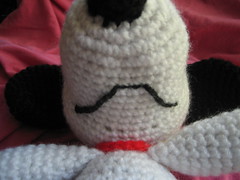
Collar
With red yarn,
Chain as many chains as you need that will ensure a snug collar on Snoopy's neck. I had 18 chains. Once you have enough chains, finish off and leave a tail for you to be able to tie the collar onto Snoopy. Join the two ends of the collar on Snoopy's neck with whatever method you wish and cut off any extra unsightly tail.
Back dot (I never knew Snoopy had a black dot on his back until I was looking at some pictures of him before I began my project! This is optional.)
With black yarn,
Sc 6 into a magic ring.
R1: 2 sc in each sc.
R2: *Sc 5, 3 sc in next sc*, twice.
Sl st to join. Fasten off. Sew onto the middle of Snoopy's back!
Now that you have your Snoopy, I would like to ask you to please, please, please do not sell this pattern. You can make as many Snoopys as you want and give them to people. Heck, you can even sell the dolls if you want (referring back to me would be appreciated!). But the pattern is my first pattern-child and I wanted to give it away for free, so please don't try to profit from it. With that said, you can share this pattern with as many people as you want. I know there are many Snoopy lovers out there!